Sending Email via Commandline

Introduction
My personal/home network is probably more complicated than most (I’ll document it soon), but basically I have 3 local servers and 2 VPS running multiple VM’s, Docker and LXD containers (all are backed up). One thing I find very useful is email reports from each of those servers and sometimes from within the containers themselves. Rather than setting up, and maintaining, my own email server which is no easy task, I use MSMTP for sending emails from the terminal or scripts via a dedicated Gmail account.
Prerequisites
- Ubuntu server (should also work on Debian too)
- Gmail account
Installation
Installation on Ubuntu is incredibly simple. Run the following command…
sudo apt install msmtp msmtp-mta mailutils bsd-mailx -y
MSMTP and all the additional supporting software will now be installed ready to configure.
Setting up the Gmail account
In order to use your Gmail account via the terminal or scripts it will need to be set up securely.
If you want to use your the Gmail account to send emails, you can’t just use your usual Gmail password. This would be a HUGE security risk. Instead, Gmail requires you to generate so-called app passwords, one for each application that needs to access your Gmail account.
This approach has several advantages:
- Gmail won’t block you because it thinks that you’re trying to sign in from an unknown device, a weird location or whatever.
- Your main Gmail password remains secret, you won’t have to write it down in any configuration file or anywhere else insecurely.
- You can change your main Gmail password and sending emails from your server will still work.
- You can revoke an app password anytime, without impacting your main Gmail password or account access.
As you can see app passwords are a really good idea, it just requires a bit of work to set it up.
Enable 2-Step Verification
2-Step Verification MUST be enabled on your Gmail account.
Simply visit https://myaccount.google.com/security.
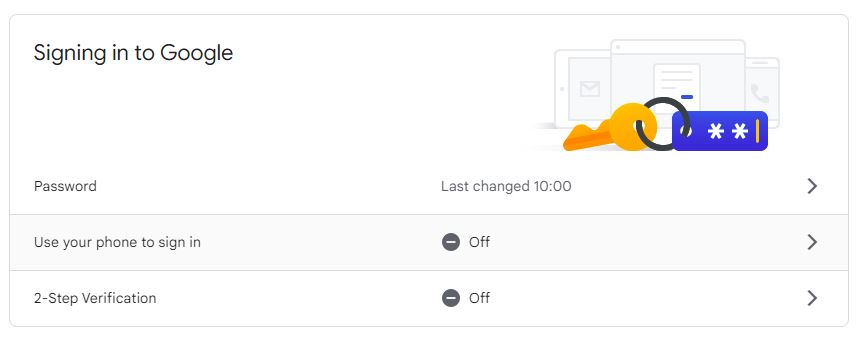
If it’s not enabled, enable it. You’ll need to login and authorize it which can be a bit tedious, but you only have to do it once in a lifetime, and after it’s done, you’re left with a more secure account, so it’s not all bad?
Generate App password
Next visit https://myaccount.google.com/apppasswords, and login.
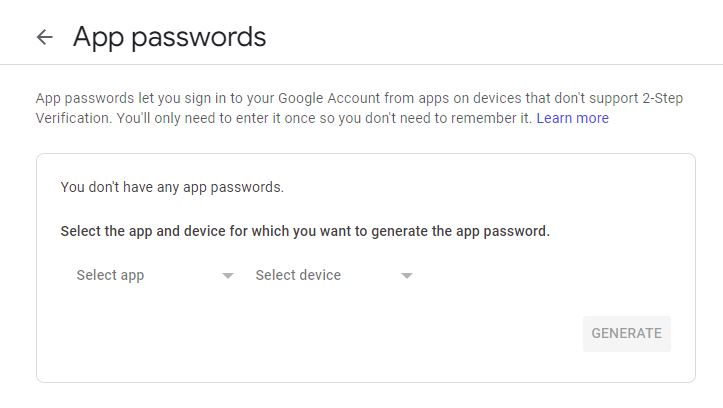
Under “Select app”, click “Mail”, and under “Select device” click “Other (Custom name)”
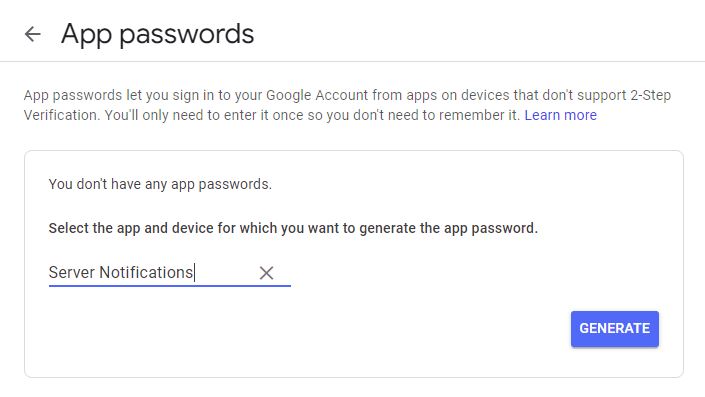
It’s supposed to be used from only one place, ie. from ONE application that is installed on ONE device. Some choose simple naming scheme like Server Notifications, I choose notifications@vpsserver1, it’s free form, choose whatever name suits you, as long as it makes sense to you, and click Generate
An App password is a 16 characters string, so let’s write it down for now, and we’re done with the Gmail config, and despite how it’s displayed there are NO SPACES in the App password.

Configuration
There are a number of steps required to fully setup email sending across the server.
Setup MSMTP
First we need to configure msmtp to route all the server’s mail through the Gmail SMTP server.
Run the following command…
sudo nano /etc/msmtprc
Now set it’s contents to…
#Accounts will inherit settings from this section
defaults
auth            on
tls             on
tls_certcheck   off
timeout         10
# tls_trust_file  /etc/ssl/certs/ca-certificates.crt
# Gmail address
account   gmail
host      smtp.gmail.com
port      587
from      [email protected]
user      [email protected]
password  app-password

# Set a default account
account default : gmail

# Map local users to mail addresses
aliases /etc/aliases
Press Ctrl+x to save the changes.
Set up mailx
In order to be able to use the mail command we need to configure mailx
Set mail transport agent to use msmtp
echo "set mta=/usr/bin/msmtp" | sudo tee -a /etc/mail.rc
Set up aliases
We need to link system users with email addresses in order for system users to receive mails from cronjobs, etc.
sudo nano /etc/aliases
# Example aliases file

# Send root to Joe and Jane
root: [email protected], [email protected]

# A specific username on the server
username: [email protected]

# Send everything else to admin
default: [email protected]
Press Ctrl+x to save the changes.
echo "alias root root<[email protected]>" | sudo tee -a /etc/mail.rc
Emails are now sent to this address if e.g. a cronjob fails. Also a general fallback address is used if messages don’t belong to root. Of course more users can be set.
Setup sendmail support
A lot of scripts and services use /usr/sbin/sendmail for sending emails. Thankfully the first msmtp feature that is listed on the homepage is “Sendmail compatible interface (command line options and exit codes)”. Meaning that msmtp is a drop-in replacement for sendmail.
By installing the msmstp-mta package above all the configuration is handled for us and everything should work “out of the box”.
Test it!
Sending a simple email to a user on a different domain.
echo "Hello World" | msmtp -d [email protected]
Or, send both a subject and a body:
printf "Subject: Test\n\nhello there username." | msmtp -d [email protected]
Test sending a mail to root
echo "Testing msmtp from ${HOSTNAME} with mail command" | mail -s "Hi root" root
Test sending a mail to another email address
echo "Testing msmtp from ${HOSTNAME} with mail command" | mail -s "Hi there" [email protected]
Conclusion
With this setup it is now very simple to integrate email functionality into the OS and any service/scripts which run on the server, without having to maintain a dedicated email server.
Credits
Many thanks to Arch Wiki which helped me stitch together all the information I needed.
Although not Ubuntu related the Arch Wiki is an invaluable resource for anyone running Linux of any kind.

Written by Alan Doyle
October 16, 2022.